
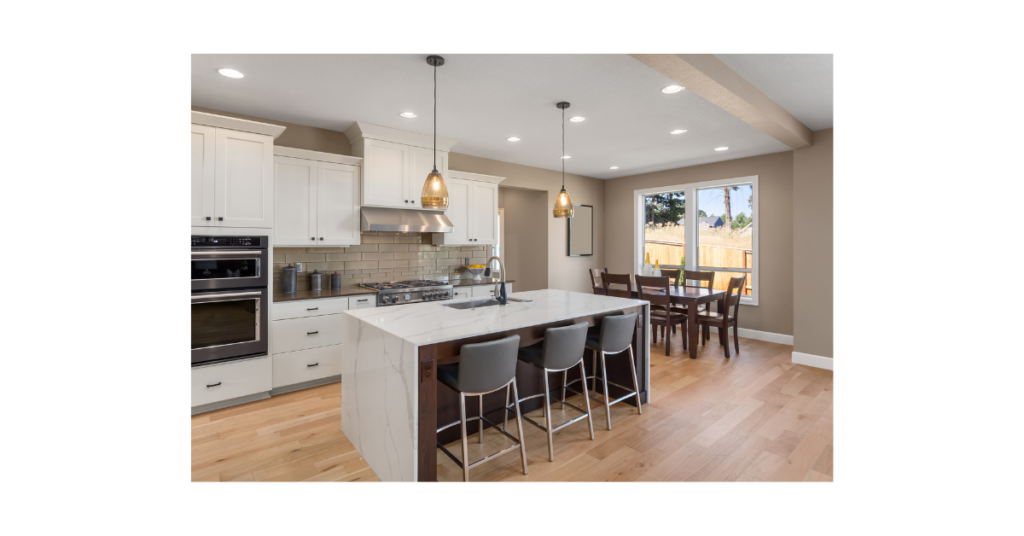
Hardwood floors impart a sense of authenticity and elegance to a home with their stunning colors, distinctive grain patterns and unmistakable warmth underfoot. But over years of wear, foot traffic and light damage, their original splendor can fade. Refinishing offers a way to revive dull, aged flooring and rediscover its inherent radiance. And for many homeowners, oil finishes are the ideal choice for refurbishing hardwoods in a gentle, nurturing manner.
This guide uncovers the art of refinishing hardwood floors using oil. We’ll explore the composition, benefits and application techniques of oil finishes. You’ll learn how to refresh worn floors and maintain their renewed grandeur with simple periodic rejuvenation. By understanding the nuances of oil finishing, you can restore the natural glory of your hardwood floors.
Rediscovering the Essence of Wood: The Allure of Hardwood Floors
Hardwood flooring has been cherished for centuries thanks to its rich, varied tones and textures that provide a home with sumptuous warmth and character. The wood’s distinctive grain patterns tell a story. And underfoot, the tactile solidity of timber adds an organic feel that manufactured flooring can’t replicate. It’s easy to see why hardwood remains synonymous with quality and tradition.
Over their lifespan, hardwood floors experience dirt, spills, scratches, impacts and general wear from everyday use. The protective finish and staining begin to degrade. Floors become cloudy and lackluster in appearance, diminishing the ambiance of a home. Refinishing becomes necessary approximately every 10-20 years depending on use and quality of the finish.
The process of refinishing renews hardwood floors by removing dingy existing finishes and blemishes down to clean, bare wood. Fresh stains or finishes are then applied to restore visual polish. This is far more affordable than ripping out and replacing old floors. Refinishing also conserves the environmental resources that went into the original flooring.
When refurbishing hardwood floors, homeowners have a choice regarding the type of new protective finish to apply. Traditional oil finishes provide a gentle, eco-friendly way to refresh the floors while honoring and enhancing the wood’s natural splendor.
Exploring Oil Finishes: A Natural Approach to Refinishing
In today’s world of synthetic floor finishes, natural oil may seem outdated. Yet it offers distinct advantages that explain its enduring popularity. Oil beautifully enhances and protects wood while allowing its authentic nature to shine through.
Oil finishes gently seep into the tiny pores of the cellular structure of the wood, bonding securely at a molecular level. This penetration brings out a subtle, burnished glow from within by enhancing the depth of the grain. The wood’s inherent beauty and legacy are honored.
Refinishing with oil respects the timeless spirit of traditional hardwood floors while allowing their natural radiance to sparkle through. Oil finishes also splendidly augment the visual impact of modern hardwood floors by revealing mesmerizing variations in the grain and tone. Let’s take a closer look at how oil finishes achieve this.
Understanding Oil Finishes: Composition and Properties
To fully appreciate the visual poetry of oil on wood, it helps to understand what these finishes are and how they interact with the wood surface:
Delving into the Composition of Oil Finishes
Oil finishes are composed of drying oils derived from plants and trees along with resins.
- Drying oils such as tung, linseed and walnut oils cure into a protective film. They also enhance the color and depth of the wood grain.
- Resins like varnish resins promote adhesion and provide gloss. Resins also accelerate the curing process.
These simple, nature-based ingredients deeply nurture the wood to reveal its organic splendor.
Unraveling the Properties of Oil Finishes
Oil finishes exhibit unique properties and interactions with wood:
- Deeply penetrates – Oil seeps into the wood pores to intertwine with the cellular fiber structure. This bonds it firmly while allowing the texture to show through.
- Enriches color – The oils expand and magnify the natural hues within the wood to uncover a richer, warmer color palette.
- Enhances natural sheen – Oil leaves a smooth, low luster finish that subtly enhances the wood’s inherent patina.
- Allows the wood to breathe – Oil doesn’t completely seal the surface, enabling the wood’s natural moisture exchange.
- Easy touch-up and recoat – New applications of oil seamlessly fuse with existing layers of oil. Localized repairs are simple.
These attributes make oil the ideal finish for enhancing hardwood floors in a holistic, celebratory fashion.
The Benefits of Refinishing with Oil
Beyond just protection, oil finishing offers unique merits that fulfill the goals of refinishing worn hardwood floors:
Embracing Natural Beauty – Honoring the Wood’s Authentic Character
Oil reveals and magnifies the organic splendor of wood through its penetrating, transformative interaction. Refinishing with oil honors the authentic legacy of hardwood floors.
Enhancing Grain and Depth – Warm, Inviting Ambiance
The tinted oils in these finishes expand the innate colors and grain details, imparting new life and a burnished patina. The results feel simultaneously rich and inviting.
Ensuring Easy Maintenance – Simple Revitalizing Upkeep
Unlike thick finishes that require sanding and stripping, oil can be easily reapplied and touched up as needed. This makes maintaining floors simple and sustainable.
For those seeking to refresh their hardwood floors with a nurturing touch, oil is the ideal finishing solution. Now let’s review how to prepare your floors to achieve compelling results with an oil finish.
Preparing for Refinishing – Creating the Ideal Canvas
Proper preparation establishes strong cohesion between the oil and wood to enable a stunning finish. Here are the key steps:
Ensuring a Safe Environment – Ventilation and Protective Gear
Refinishing can stir up dust and chemical fumes, so safety measures are essential.
- Open windows and use fans to circulate fresh air.
- Wear an N95 respirator mask, goggles and gloves throughout the process.
Removing Existing Finishes – Stripping Away Old Layers
Existing worn finishes or oils must be thoroughly stripped away to enable full penetration of the new oil coats.
- Use a floor sander with coarse to fine grit screens to remove existing layers of finish.
- Work gradually to avoid over-sanding, which can damage the wood surface.
- Vacuum thoroughly between steps to remove all dust.
Deep Cleaning and Dust Removal – Preparing a Pristine Base
After abrading floors to bare wood, they must be cleaned meticulously:
- Wipe surfaces with a tack cloth to remove residual dust from cracks and pores.
- Use a specialized wood floor deep cleaning solution to remove embedded grime and residues.
- Allow floors to fully dry. Any moisture will impede oil penetration and curing.
Thorough prep allows the oil to saturate and bond with the wood for maximum enhancement. Now we’re ready to apply the rejuvenating finish.
Applying Oil Finishes – Techniques for Flawless Results
The two main options for oil finishing are Danish oil and tung oil. While each has nuances, both share a similar application methodology. Proper techniques will yield a smooth, consistent oil coat that enlivens the floor’s beauty.
Selecting the Right Oil
Danish oil – This blend of oils and varnish penetrates deeply to nourish and protect the wood. Easy to apply.
Tung oil – Composed of pure tung oil. Offers excellent water resistance but requires more coats.
Achieving an Even Application
- Use a clean pad applicator or lint-free cotton rags to apply the oil.
- Maintain a thin, uniform coat. Spread evenly and avoid drips or heavy application.
- Work in manageable sections, especially on large floors, to ensure consistency.
Ensuring Flawless Coverage
- Apply oil following the direction of the floorboards to prevent streaks.
- Overlap strokes and repeat over areas that appear dry or missed.
- Check for even oil saturation and coverage under lighting before moving on.
By honing these application skills, you’ll be able to reveal the inner radiance of your hardwood floors.
Maintaining Oiled Hardwood Floors
Refinishing is only the start of the story. Using the right maintenance protocol will ensure your oiled hardwood floors stay revitalized for years.
Regular Cleaning – Gentle Methods
Oil finishes are sensitive to excess moisture and abrasives. Use gentle cleaning techniques:
- Dry dust mop frequently to remove grit that can scratch floors.
- Only damp mop using a mild cleaner formulated for oiled wood floors. Avoid excessive water.
- Immediately wipe up spills to prevent moisture damage to the wood.
Periodic Reapplication – Replenishing the Oil Finish
Over time, traffic wear and UV exposure deplete the oil finish. Reapplying oil rejuvenates protection and enriches color.
- Lightly buff floors and apply a fresh coat of oil to worn areas or overall annually.
- The new oil layers will fuse seamlessly with the existing finish.
Addressing Scratches and Marks – Making Prompt Repairs
The key is to repair isolated damage before it spreads:
- Gently buff out minor scuffs, scratches or marks using extra fine steel wool.
- Spot apply oil to damaged areas to blend with surrounding areas. Allow to fully cure before use.
- Be vigilant about fixing damage promptly to prevent degrading of the overall floor.
With proper care, oiled hardwood floors will maintain their refreshed radiance and lasting protection coat after coat.
Conclusion – Celebrating the Timeless Allure of Oil Finishes
Refinishing offers a compelling way to restore faded, worn hardwood floors to their former glory. And oil finishes provide a gentle, nurturing approach that reveals the wood’s essence.
Oil seeps into the cellular fiber to uncover the organic splendor within. Its protective richness and ease of maintenance keep floors looking revived with minimal upkeep. Oil finishing treats wooden floors to a sense of caring, craftsmanship and legacy.
For those seeking to honor the heritage of their hardwood floors, oil finishes breathe new life into tired boards in a holistic, nature-derived fashion. With the proper refinishing and care outlined here, the inner radiance of your floors will beam through for years to come.
BONUS: Troubleshooting Oil Finish Issues
While oil refinishing often goes smoothly, some common challenges occasionally arise:
Discoloration Over Time
Gradual yellowing or darkening oil likely indicates dirt buildup, inferior oil quality or sun exposure. Try stripping and recoating a small test spot with new oil to gauge results.
Blotchy, Uneven Absorption
This is caused by surface prep issues or attempting to apply oil atop existing finish layers. Ensure bare wood exposure then apply oil conservatively to allow gradual absorption.
Gummy Residue
Insufficient oil drying time is the culprit here. Ensure good ventilation, wipe away any oil excess after 30 minutes and allow extra drying time before use.
White Haze in Finish
If a cloudy haze appears, the oil may have interacted with surface dirt or another finish. Try gently removing the affected layer with steel wool before reapplying fresh oil.
With some finessing, you’ll master oil’s idiosyncrasies and achieve beautiful results. Let us know if any other flooring questions arise!
