

If you have original hardwood floors in your Seattle home, they may be showing some wear and tear over the years from foot traffic, pets, and everyday life. Refinishing hardwood floors with a fresh coat of polyurethane is an effective way to restore their beauty and function.
Oil-based polyurethane has traditionally been the product of choice for refinishing hardwood floors. Unlike water-based polyurethane, oil-based formulas penetrate deeper into the wood grain to provide superior protection. The oil content also gives the finish a warm, amber glow.
Refinishing hardwoods can seem daunting, but having the right information and preparations will ensure success. This guide covers everything Seattle homeowners need to know about using oil-based polyurethane to refinish their worn hardwood flooring. Let’s start with the basics.
What is Oil-Based Polyurethane?
Polyurethane is a clear, plastic-like resin that cures into a thick, protective coating. The “oil-based” refers to the petroleum-derived solvents used to keep the resins in liquid suspension form.
Common solvents include mineral spirits, naphtha, and toluene. These allow the polyurethane to flow on easily and penetrate deeply into the wood before curing.
Oil-based poly contains around 45-60% solids by volume when compared to water-based versions with just 5-8% solids. This higher solids content is what makes it so protective and durable.
Why Choose Oil-Based Polyurethane?
There are several reasons why oil-based polyurethane is still the product of choice for refinishing wood floors:
Enhances Wood Grain – The oil allows tints and stains in the wood to show through clearly.
Ambering Effect – The oil content gives floors a rich, warm patina over time.
Durable Finish – Higher solids content creates a harder, more scratch-resistant finish.
Moisture Resistant – Oil-based poly protects wood from warping due to spills and humidity.
Easy Touch-ups – New coats fully bond with existing oil-based polyurethane.
Oil-based poly does take longer dry and requires mineral spirits for cleanup. We’ll go over some techniques to help speed up the process. With proper ventilation, it can be safely used indoors.
The Benefits of Refinishing Hardwood Floors with Polyurethane
Before we delve into the steps, let’s review why refinishing with a fresh coat of polyurethane is worthwhile:
Restores Original Beauty – Removes old finish and grime to uncover the natural wood tone and pattern beneath.
Repairs Damage – Sanding smooths out dents, scratches, gouges, and pet claws.
Protects Wood – Polyurethane seals the surface from spills, moisture, and daily wear and tear.
Easier Cleaning – The protective barrier resists dirt, dust, and stains.
Extends Floor Life – Flooring properly refinished with polyurethane will last for decades.
Enhances Shine – Polyurethane leaves floors with a luminous, warm glow when cured.
Now let’s go over everything you’ll need to tackle this rewarding project.
Refinishing Materials and Tools
Refinishing hardwood floors takes some work, but the payoff is worth it. These supplies will make the process go smoothly:
Oil-Based Polyurethane – Use an indoor flooring formula. Choose satin, semi-gloss, or high gloss sheen.
Sandpaper – Coarse, medium, and fine grit papers for sanding floors.
Edger – Power edger to sand floor edges near baseboards.
Roller Frame and Covers – A high-quality roller makes quick work of polyurethane application.
Natural Bristle Brush – For cutting in poly along edges and corners.
Painters Tape – For protecting baseboards, thresholds, and adjacent surfaces.
Rags & Paper Towels – For wiping up drips, spills, and excess finish.
Mineral Spirits – For cleaning oil-based poly from brushes and equipment.
Stir Sticks – For mixing the polyurethane prior to applying.
Mop Bucket & Floor Cleaner – For washing floors before sanding and refinishing.
Safety Gear – Eye protection, gloves, and a respirator mask rated for organic vapors.
Fan – To improve ventilation while applying oil-based polyurethane.
Okay, we’ve covered the basics about oil-based polyurethane. Now let’s focus on how to use it to revive your hardwood floors.
Step 1 – Prepare the Floors
The first step is preparing the floors for refinishing. Clean floors ensure the polyurethane bonds optimally. Here are the main prep tasks:
- Remove all furniture, area rugs, outlets covers, and fixtures from the room. This includes felt pads under chair and table legs.
- Vacuum the bare floors thoroughly to remove surface dust, dirt, pet hair, and debris. Get into corners and crevices.
- For deeper cleaning, mop floors with a wood floor cleaner. Let them fully dry afterwards.
- Use painter’s tape to mask off baseboards, door jambs, and adjacent surfaces you don’t want stained.
- Hammer down any popped nails or staples protruding from the flooring.
- Inspect the floors for deep scratches, gouges, warped planks, or other defects needing repair prior to refinishing.
- Fill any small gaps between boards with wood filler. Allow repairs to dry completely before sanding.
Proper prep prevents dust and debris from interfering with polyurethane adhesion. Now let’s focus on abrading off the old finish.
Step 2 – Sand the Hardwood Floors
Sanding accomplishes two important things – it removes the existing finish or stain down to bare wood, and levels out any dents, scratches, or uneven spots in the flooring.
Be sure to vacuum after each sanding pass to remove dust. Here are the basic steps:
- Sand with coarse 30-40 grit paper – The first pass removes old finish using a drum sander and edger. Sand perpendicular to boards.
- Sand with medium 60-80 grit – The second pass smooths and blends boards. Sand at a 45° diagonal to the floor direction.
- Sand with fine 100-120 grit – The final light sanding ensures the floor is perfectly uniform for finishing. Go parallel to floor direction.
Change sandpaper frequently to maintain cutting efficiency. Wipe floor with a barely damp rag after the last sanding to reveal any remaining shiny spots needing attention. The floors should be uniformly dull when sanding is complete.
Step 3 – Clean and Tack Floors
Now that the floors are stripped down to raw wood, we need to remove any remaining dust, oil, or grime that could interfere with polyurethane adhesion:
- Thoroughly vacuum all dust then damp mop floors with a wood cleaner and clean water.
- Allow floors to fully dry. Dry times are extended in damp Seattle weather.
- Wipe floors with a lint-free rag dampened with mineral spirits. This removes any lingering dust and degreases the wood.
- Use a tack cloth for a final wipe down to pick up any remaining dust or oil. The floors should look perfectly clean.
The floor is now ready for the first application of oil-based polyurethane!
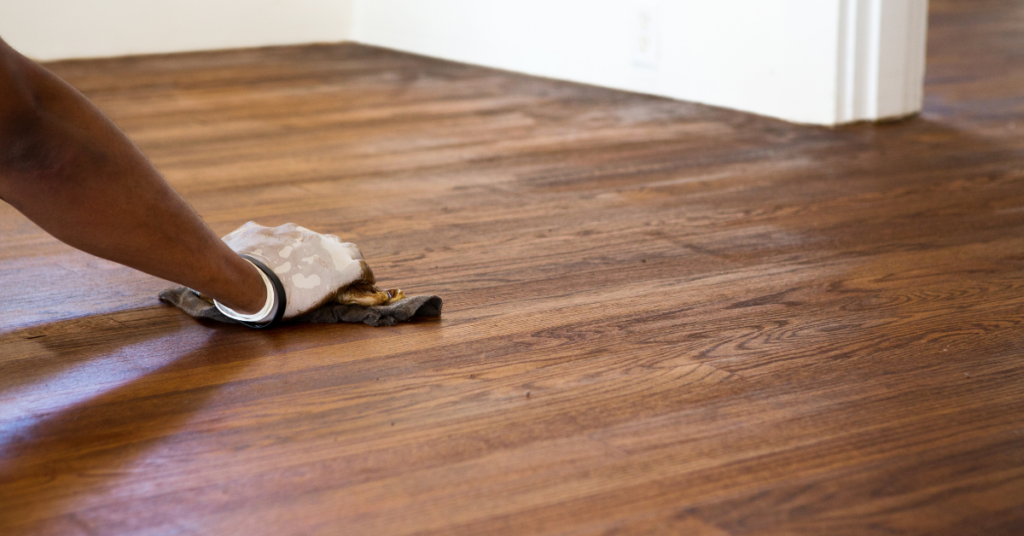
Step 4 – Apply First Coat of Polyurethane
With the floors cleaned and degreased, it’s finally time to apply the first preservative coat of oil-based polyurethane:
- Stir the polyurethane thoroughly before starting. Do not shake it. This avoids creating bubbles.
- Use a good quality natural bristle brush to cut in polyurethane along baseboards, edges, and corners. Avoid overlapping onto main floor area.
- Pour poly into a paint tray and load your roller with a moderate amount. Use a 1/4” or 3/8” nap roller cover.
- Begin applying the finish parallel to the floorboards in 3-4 foot wide sections, maintaining a wet edge as you go to prevent lap marks.
- Feather out the final strokes of each section to avoid excess buildup along board edges.
- Make sure polyurethane is worked into corners. Stop periodically to re-load the roller with more finish.
- Allow at least 8-12 hours of dry time before evaluating if a second coat is needed. Oil-based poly cures slowly.
If properly prepped, the first coat should go on smooth and even. Now we’ll discuss adding protective layers.
Step 5 – Apply Second & Third Coats
Once the first coat has cured overnight, examine the floors closely in good lighting. Are there any skipped spots or uneven sheen? If so, use 220 grit sandpaper to lightly buff them smooth.
Vacuum up all dust, then wipe clean with a dry lint-free rag followed by a quick mineral spirits tacking. You’re ready for the second coat.
Repeat the application process from step 4 using a fresh roller cover. Apply this coat perpendicular to the first. After drying overnight, evaluate if a third coat is needed for desired build and protection.
The third and final coat of polyurethane will leave your floors with a smooth, durable finish that protects the wood while letting its inner beauty shine through.
Step 6 – Let the Polyurethane Cure
Oil-based polyurethane takes up to 30 days to fully cure and harden compared to approximately one week for water-based products. Here are some pointers for letting your newly refinished floors properly cure:
- Avoid walking on floors for at least 24-48 hours. The cure time will be a bit longer in cool, damp Seattle weather.
- Use cardboard panels to walk on floors if absolutely needed during the first several days.
- Allow 5-7 days minimum for replacing furniture, area rugs, and appliances. Use furniture cups under heavy pieces.
- Wait 30 days for a complete cure before damp mopping floors or doing any heavy cleaning.
- Use Swiffer-type dry dust mops for light cleaning during the curing period.
- Direct sunlight speeds curing. Open blinds and shades during the day.
Be patient – the cure time is essential for the finish reaching maximum durability, hardness, and moisture resistance.
Conclusion and Maintaining Refinished Floors
Refinishing dull, dated hardwood floors restores them to their former glory. With oil-based polyurethane, the amber patina becomes warmer and richer over time.
Follow these steps for success – thorough floor prep, cautious sanding, and applying multiple thin coats of polyurethane. Allowing proper cure time is also crucial. The end results will impress you.
Here are some final tips for keeping your newly refinished floors in great shape:
- Use interior and exterior doormats to prevent dirt and grit from being tracked inside.
- Vacuum regularly with soft brush attachments. Microfiber mops work well for dusting.
- Immediately wipe up any liquid spills to prevent possible wood swelling or finish damage.
- Do not use rubber-backed rugs or mats that could interact with the finish.
- Keep pet nails trimmed to avoid scratching.
- When polyurethane eventually shows wear, apply 1-2 maintenance coats to refresh.
Oil-based polyurethane provides a timeless, protective finish for hardwood floors. Contact us if you need assistance with your upcoming refinishing project or have additional questions!
BONUS: All About Oil-Based Polyurethane
Now that we’ve covered the basics of using oil-based polyurethane to refinish hardwood floors, here’s some bonus info to expand your knowledge:
Available Sheens
Oil-based polyurethane is sold in the same finish sheens as water-based:
- Gloss – A smooth, shiny finish that magnifies flaws.
- Semi-Gloss – A polished look with slightly less shine than full gloss.
- Satin – Subtle luster that minimizes imperfections. A popular choice.
- Matte – Flat, non-reflective finish but more prone to scuffing.
Recoating and Cure Time
Fresh coats of oil-based poly will fuse fully with previous coats. Multiple layers build added protection. Lightly sand between coats to ensure adhesion. Oil-based poly cures slowly, taking 5-7 days to dry fully and 30 days to completely harden depending on humidity and ventilation.
Tinting the Finish
Clear oil-based poly can be tinted with oil-based wood stain pigments to alter the tone. Stir thoroughly before and during application for color consistency. Keep pigment ratio low.
Spot Repairs
Localized finish damage can be repaired by feathering polyurethane out into surrounding areas after a light sanding. This avoids having to refinish the entire floor.
Maintenance Coats
Over time as oil-based poly shows wear, new maintenance coats will revive the finish. Lightly sand, clean, degrease and apply 1-2 fresh coats just in high traffic areas or overall as needed.
Compatibility with Stains
Since oil-based polyurethane contains similar solvents as oil-based stains, they are fully compatible. Water-based stains may react adversely with oil-based poly and are not recommended.
We hope these additional oil-based polyurethane tips help with your hardwood floor refinishing or finishing project in Seattle. Let us know if you have any other questions!
